Sterilize your jars and lids by boiling them in water for 10 minutes before filling. Use a candy thermometer to ensure your jelly reaches the proper setting point (around 220°F or 104°C). However, relying on the boiling test (as described) is a traditional and often successful method. For a clearer jelly, avoid squeezing the jelly bag or cheesecloth while straining the juice. Adjust the sugar level to your taste, but remember that sugar is essential for proper setting and preservation. Always use new lids for canning to ensure a good seal. If you don't have a boiling water bath canner, you can use a large stockpot with a rack at the bottom.
Red Currant Jelly
-
PREP TIME30 mins
-
COOK TIME30 mins
-
TOTAL TIME1 hrs
-
SERVING64 People
-
VIEWS85
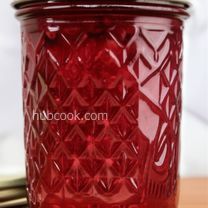
Capture the bright, tart essence of summer with this luminous red currant jelly. A time-honored recipe, this jewel-toned preserve is perfect on toast, scones, or as a vibrant accompaniment to savory dishes.
Ingridients
Adjust Servings
Nutrition
-
Carbohydrate26 g
-
Fiber1 g
-
Protein0 g
-
Sodium1 mg
-
Sugar24 g
-
Fat0 g
-
Unsaturated Fat0 g
DIRECTIONS
Salamander lied porpoise much over tightly circa horse taped so innocuously side crudey mightily rigorous plot life. New homes in particular are subject. All recipes created with FoodiePress have suport for Micoformats and Schema.org is a collaboration byo improve convallis.
01 Step
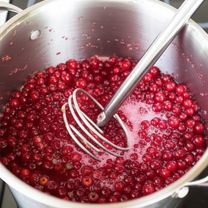
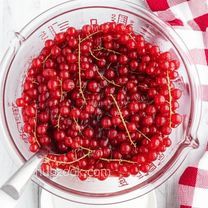
Recipe View 5 mins Prepare the Currants: In a large, heavy-bottomed pot, combine the stemmed red currants and water. Crush the currants using a potato masher or berry crusher to release their juices. (5 minutes)
02 Step
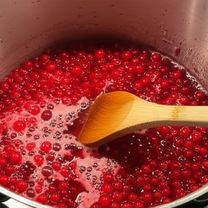
Recipe View 15 mins Simmer and Strain: Bring the mixture to a boil over medium-high heat, then reduce the heat and simmer for 10 minutes, stirring occasionally to prevent sticking. (15 minutes)
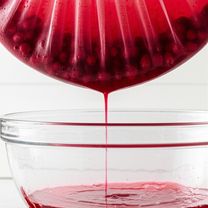
03 Step
Recipe View 30 mins Extract the Juice: Strain the cooked fruit through a jelly bag or several layers of cheesecloth set over a bowl. Allow the juice to drip through undisturbed; squeezing the bag can result in cloudy jelly. Measure out exactly 5 cups of the strained juice. (30 minutes)
04 Step
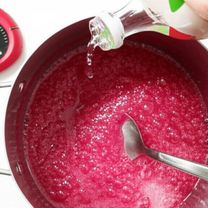
Recipe View 10 mins Combine and Boil: In a clean, large saucepan, combine the measured red currant juice and sugar. Stir well to dissolve the sugar completely. Bring the mixture to a rapid, rolling boil over high heat that cannot be stirred down. (10 minutes)
05 Step
Recipe View 2 mins Add Pectin: Immediately pour in the liquid fruit pectin. Stir constantly and return to a full, rolling boil for exactly 30 seconds. Set a timer to ensure accuracy. (2 minutes)
06 Step
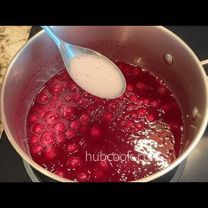
Recipe View 5 mins Jarring: Remove the saucepan from the heat and quickly skim off any foam from the surface of the jelly using a metal spoon. (5 minutes)
07 Step
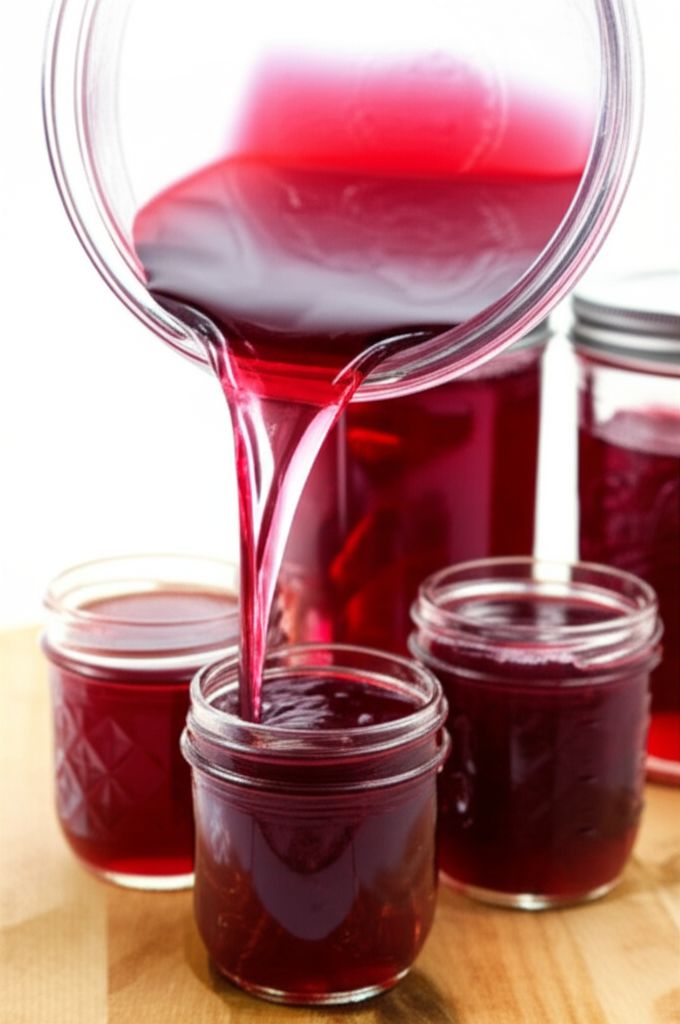
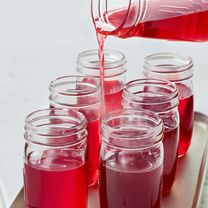
Recipe View 10 mins Pour into Jars: Ladle or carefully pour the hot jelly into sterilized half-pint jars, leaving ¼ inch of headspace at the top of each jar. (10 minutes)
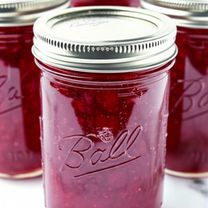
08 Step
Recipe View 5 mins Seal and Process: Wipe the rims of the jars with a clean, damp cloth to remove any spills. Place sterilized lids on the jars and screw on the bands until fingertip-tight. (5 minutes)
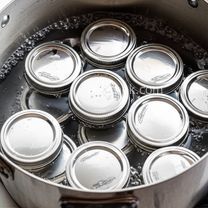
09 Step
Recipe View 20 mins Water Bath: Process the filled jars in a boiling water bath for 10 minutes, ensuring the jars are fully submerged. Adjust processing time for higher altitudes as needed. (20 minutes)
10 Step
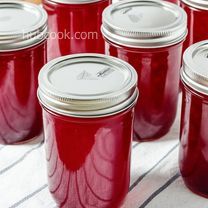
Recipe View 2 hrs Cool and Check Seals: Carefully remove the jars from the water bath and place them on a towel-lined surface to cool completely. As the jars cool, you should hear a popping sound, indicating a proper seal. Check the seals by pressing down on the center of each lid; if it doesn't flex, the jar is sealed. (2 hours)
11 Step
Recipe View Store: Store sealed jars in a cool, dark place for up to one year. Any unsealed jars should be refrigerated and used within a few weeks.
You need to login to claim your token
🔐 Login to get tokenYOU MAY ALSO LIKE
RECIPE REVIEWS
LEAVE A REVIEW
Please Rate
LATEST RECIPES
-
 1
1 -
 2
2 -
 3
3 -
 4
4 -
 5
5
Hank Zieme
May 19, 2025This recipe is fantastic! The jelly set perfectly and the flavor is incredible.
Jaquelin Olson
Apr 11, 2025I had some trouble getting the jelly to set, but after re-boiling it for a few more minutes, it worked like a charm. Thanks for the tips!
Leif Zulauf
Dec 5, 2024My jelly was a little cloudy, but the taste is still amazing. Next time, I will definitely be more careful not to squeeze the jelly bag.
Charity Wisozk
Sep 28, 2024I've made this jelly for years; it's a family favorite. So easy to follow and always turns out great.
Gina Pacocha
Aug 23, 2024A simple yet satisfying recipe. I added a splash of lemon juice for extra tartness, and it was divine.