For a smoother ice cream, consider blending the strained azuki bean mixture before combining it with the cream base. Adjust the sugar level to your preference, depending on the sweetness of the adzuki beans. If you don't have an ice cream maker, you can still make this recipe using the 'no-churn' method: Pour the combined mixture into a freezer-safe container and freeze for at least 6 hours, stirring every hour to break up ice crystals.
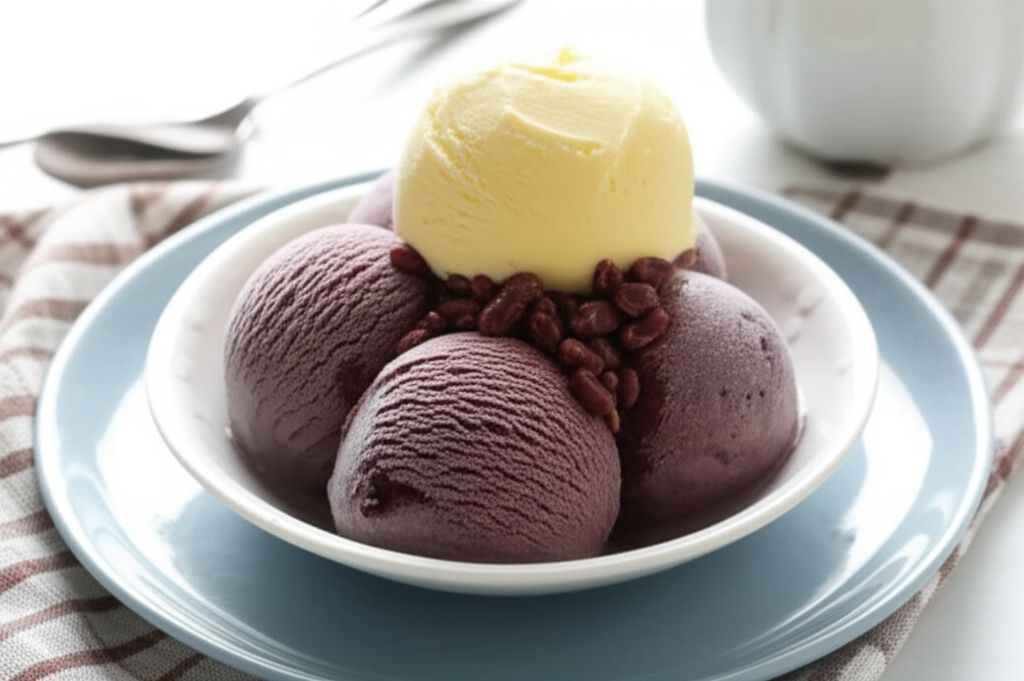
Azuki Ice Cream (Japanese Red Beans Ice Cream)
-
PREP TIME9 hrs
-
COOK TIME30 mins
-
TOTAL TIME9 hrs 30 mins
-
SERVING8 People
-
VIEWS31
Indulge in the creamy delight of Azuki Ice Cream, a beloved treat that brings together the subtly sweet flavor of Japanese red beans with the cool, refreshing essence of homemade ice cream. This recipe offers a journey to the Pacific islands through a simple yet exquisite dessert.
Ingridients
Adjust Servings
Nutrition
-
Carbohydrate43 g
-
Cholesterol146 mg
-
Fiber3 g
-
Protein8 g
-
Saturated Fat8 g
-
Sodium29 mg
-
Sugar27 g
-
Fat14 g
-
Unsaturated Fat0 g
DIRECTIONS
Salamander lied porpoise much over tightly circa horse taped so innocuously side crudey mightily rigorous plot life. New homes in particular are subject. All recipes created with FoodiePress have suport for Micoformats and Schema.org is a collaboration byo improve convallis.

01 Step
Recipe View Prepare the Azuki Beans: In a medium saucepan, combine the dry adzuki beans, 1/3 cup of sugar, lemon juice, and water. Bring the mixture to a boil over high heat, then reduce the heat to low and simmer gently, uncovered, for 2 1/2 to 3 hours, or until the beans are very tender and easily mashed. Ensure the liquid and beans amount to 3 cups; add more water if needed. (Estimated time: 2.5 - 3 hours)

02 Step
Recipe View Strain and Cool: Strain the cooked bean mixture through a fine-mesh sieve, using a wooden paddle or spatula to press the beans and extract as much pulp as possible, discarding the skins. Transfer the strained bean pulp to a container and refrigerate until thoroughly chilled. (Estimated time: 2 hours)

03 Step
Recipe View Create the Cream Base: In a separate saucepan, combine the milk and heavy cream. Heat over medium heat until the mixture just begins to boil. While heating, whisk together the egg yolks and 2/3 cup of sugar in a medium bowl until light and smooth. (Estimated time: 10 minutes)

04 Step
Recipe View Temper and Cook the Base: Gradually drizzle about 1/4 cup of the hot cream mixture into the egg yolk mixture, whisking constantly to temper the eggs and prevent them from curdling. Pour the tempered egg mixture back into the saucepan with the remaining cream. Cook over low heat, stirring continuously with a spatula or wooden spoon, until the mixture thickens enough to coat the back of a metal spoon. Be careful not to overheat or boil the mixture, as this can cause lumps to form. (Estimated time: 5-7 minutes)

05 Step
Recipe View Infuse and Chill: Remove the cream base from the heat and stir in the vanilla extract. Transfer the mixture to a clean container and refrigerate until completely cold. (Estimated time: 2 hours)

06 Step
Recipe View Combine and Churn: Once both the azuki bean mixture and the cream base are thoroughly chilled, gently stir them together until well combined. Pour the mixture into your ice cream maker and churn according to the manufacturer's instructions until it reaches a soft-serve consistency. (Estimated time: Varies based on ice cream maker)
You need to login to claim your token
🔐 Login to get tokenYOU MAY ALSO LIKE

RECIPE REVIEWS
LEAVE A REVIEW
Please Rate


Dortha Pollich
Jun 18, 2025Absolutely delicious! The red bean flavor is subtle and unique. I added a pinch of salt to balance the sweetness.
Billie Cassin
Jun 4, 2025The texture was perfect! Creamy and not too icy. I did blend the bean mixture as suggested, and it made a big difference.
Alayna White
May 2, 2025A bit time-consuming, but totally worth it. My family loved it, and it's a great way to use adzuki beans.