For extra flavor, consider adding aromatic herbs such as rosemary, thyme, or sage to the turkey cavity along with the onion and celery. Ensure your oven is properly calibrated for accurate temperature readings. If the turkey skin begins to brown too quickly, tent it loosely with aluminum foil during the roasting process. Use a reliable instant-read thermometer for accurate temperature readings.
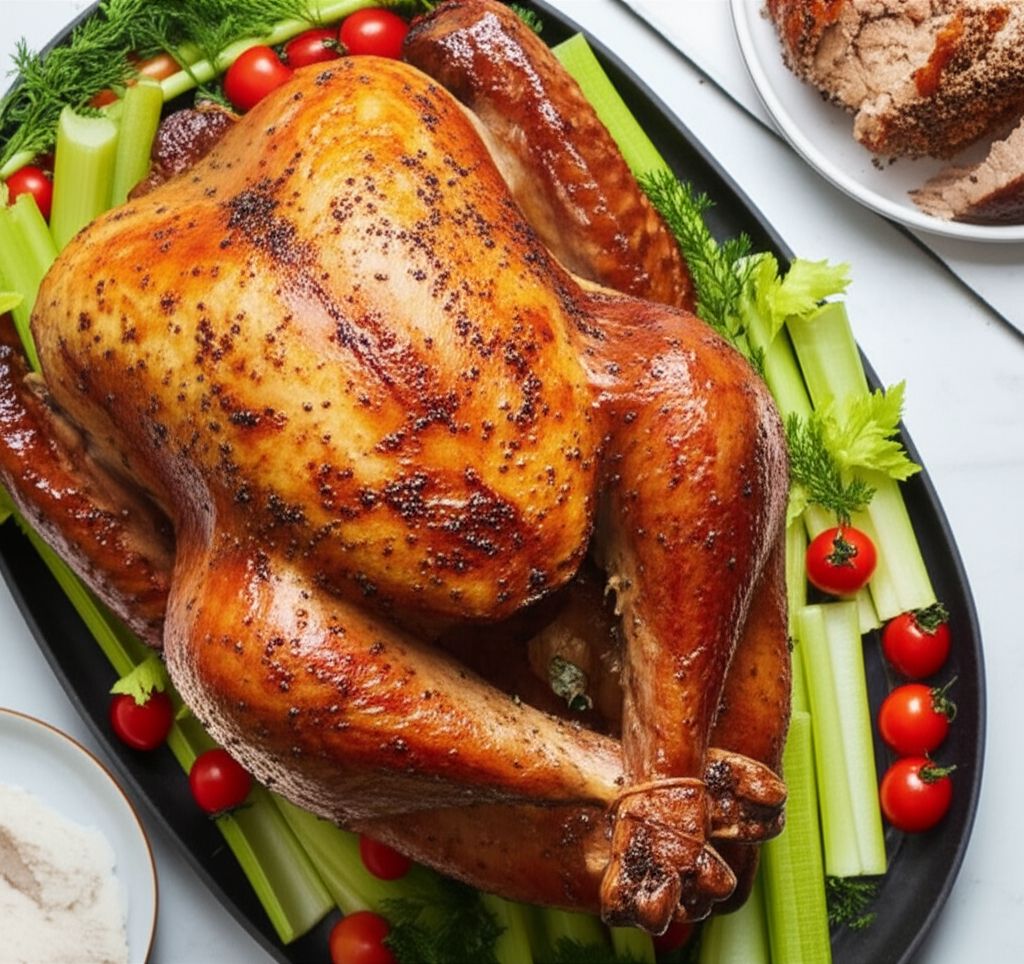
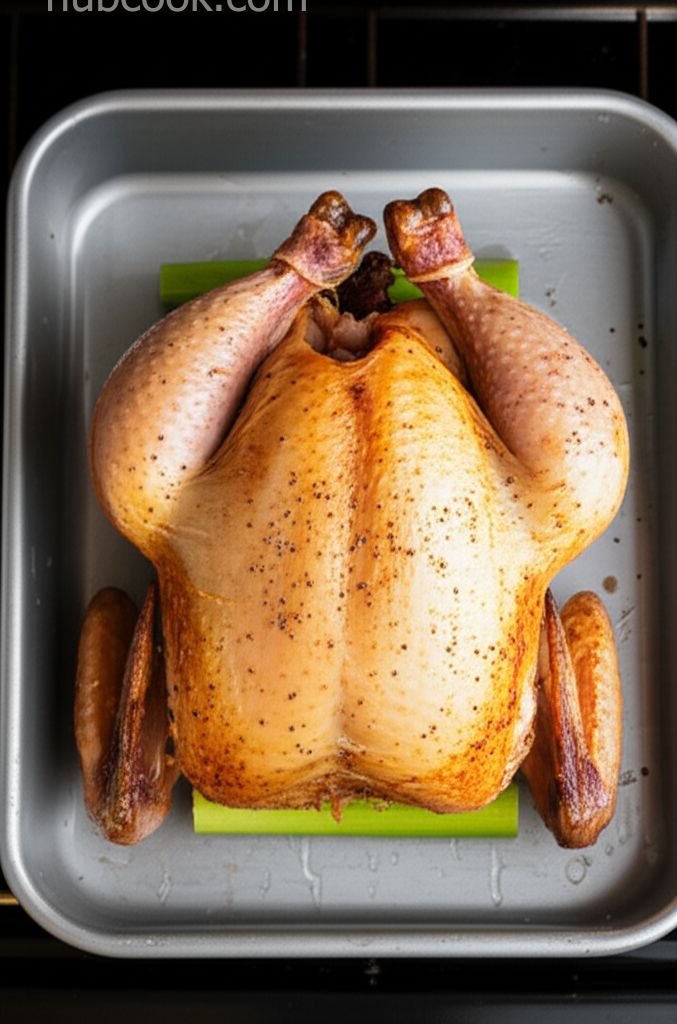
Dry Brine Turkey
-
PREP TIME15 mins
-
COOK TIME2 hrs 30 mins
-
TOTAL TIME84 hrs 15 mins
-
SERVING15 People
-
VIEWS66
Unlock the secret to a supremely succulent and deeply flavorful turkey with this simple yet transformative dry brining technique. This method guarantees a memorable centerpiece for your festive feast, boasting a perfectly crisp skin and juicy, tender meat.
Ingridients
Adjust Servings
Nutrition
-
Carbohydrate1 g
-
Cholesterol268 mg
-
Fiber0 g
-
Protein92 g
-
Saturated Fat9 g
-
Sodium1383 mg
-
Sugar1 g
-
Fat32 g
-
Unsaturated Fat0 g
Follow The Directions
01
StepPrepare the Turkey: Pat the turkey dry inside and out with paper towels. (5 minutes)
02
StepDry Brine: Generously season the entire surface of the turkey, inside and out, with kosher salt, paying particular attention to the breast and thighs. (10 minutes)
03
StepFirst Refrigeration: Place the turkey breast-side up in a roasting pan and cover loosely with plastic wrap. Refrigerate for 48 hours. (2 days)
04
StepSecond Refrigeration: Flip the turkey breast-side down, cover with plastic wrap, and refrigerate for an additional 24 hours. (1 day)
05
StepAir Dry: Remove the plastic wrap and place the turkey on a rack set over a baking sheet. Allow the turkey to air-dry uncovered in the refrigerator for at least 8 hours, or overnight. (8 hours)
06
StepFinal Prep: Bring the turkey to room temperature (about 1 to 2 hours before roasting). Pat it dry with paper towels once more. Season with freshly ground black pepper. Stuff the cavity with the onion wedges and celery stalks. (2 hours)
07
StepInitial Roasting: Preheat oven to 425 degrees F (220 degrees C). Place the turkey, breast-side down, in a roasting pan. Roast for 30 minutes to achieve a beautiful golden color. (30 minutes)
08
StepContinue Roasting: Remove the turkey from the oven and carefully flip it breast-side up. Reduce the oven temperature to 325 degrees F (165 degrees C). Continue roasting until an instant-read thermometer inserted into the thickest part of the thigh reads 165 degrees F (74 degrees C), approximately 2 hours. (2 hours)
09
StepRest: Transfer the turkey to a large platter and loosely tent with aluminum foil. Allow the turkey to rest for at least 30 minutes before carving. This allows the juices to redistribute, resulting in a more tender and flavorful bird. (30 minutes)
You need to login to claim your token
🔐 Login to get tokenYOU MAY ALSO LIKE
RECIPE REVIEWS
LEAVE A REVIEW
Please Rate

Noble Littel
May 20, 2025My family said it was the best turkey I've ever made!
Bryce Heidenreich
Apr 17, 2025I added some orange slices and fresh herbs to the cavity for extra flavor and it was delicious.
Declan Kuhic
Apr 7, 2025Thanks for this recipe! I will be using it every year.
Terrell Bergnaum
Feb 22, 2025I was skeptical at first, but this recipe is so easy and the results are amazing. No more wet brining for me!
Loyce Huel
Feb 6, 2025I accidentally overcooked my turkey slightly, but it was still incredibly moist thanks to the dry brine.
Oren Jacobs
Dec 29, 2024Be sure to plan ahead! The dry brining process takes a few days, but it's totally worth it.
Coby Kuhlman
Oct 21, 2024The crispy skin was the best part! Everyone raved about it.
Torey Kunze
Sep 22, 2024This dry brine method is a game-changer! My turkey was incredibly moist and flavorful.
Alberto Wintheiser
Sep 11, 2024The directions were clear and easy to follow, even for a beginner cook like me.