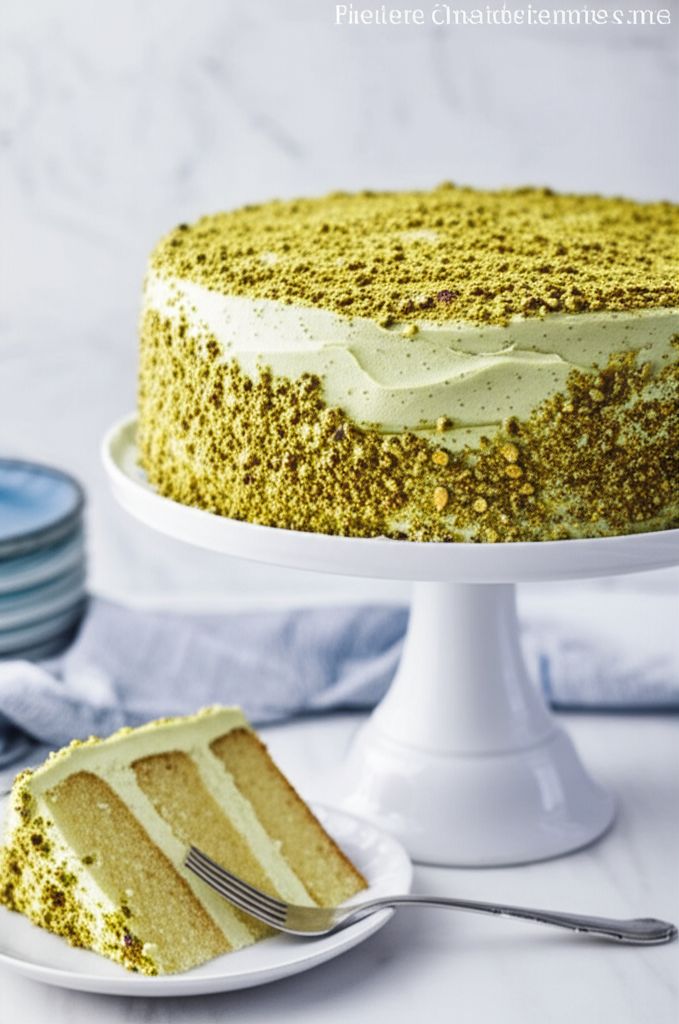
For a more intense pistachio flavor, toast the pistachios before grinding. Ensure all ingredients are at room temperature for a smoother batter and buttercream. The cake layers can be baked a day ahead and stored at room temperature, wrapped tightly in plastic wrap. The assembled cake can be stored in the refrigerator for up to 3 days.
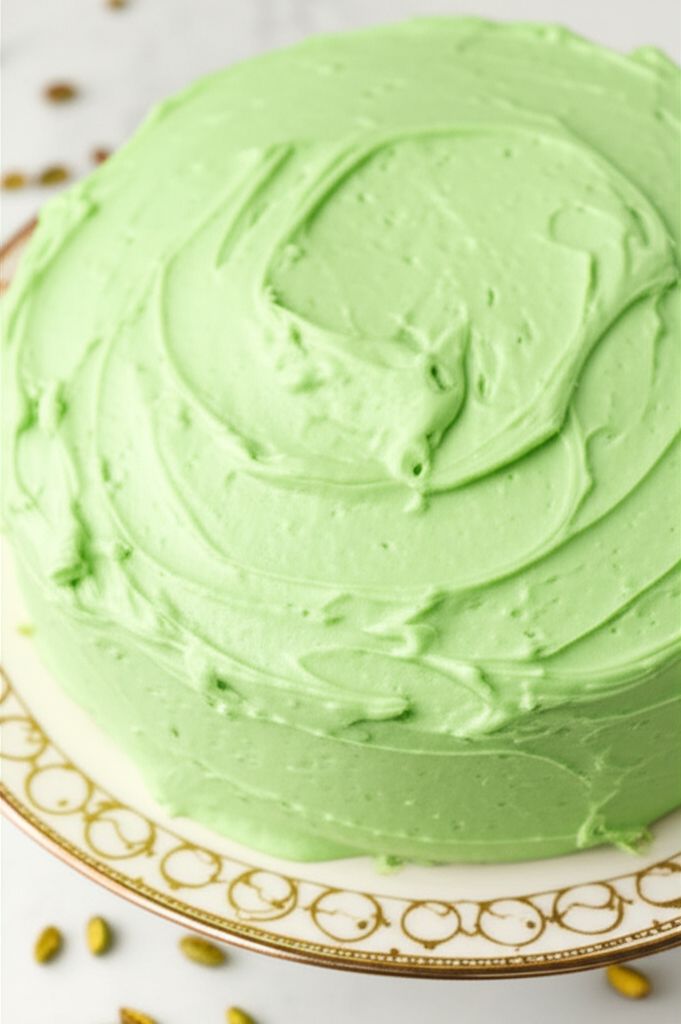
Pistachio Layer Cake with Cream Cheese Buttercream
-
PREP TIME1 hrs
-
COOK TIME25 mins
-
TOTAL TIME2 hrs 35 mins
-
SERVING20 People
-
VIEWS9
Elevate your dessert game with this stunning Pistachio Layer Cake! Each tender, pistachio-infused layer is enrobed in a luscious cream cheese buttercream, creating a symphony of nutty sweetness and creamy tang. A true showstopper that's surprisingly easy to create!
Ingridients
Adjust Servings
Nutrition
-
Carbohydrate85 g
-
Cholesterol59 mg
-
Fiber2 g
-
Protein9 g
-
Saturated Fat14 g
-
Sodium268 mg
-
Sugar69 g
-
Fat30 g
-
Unsaturated Fat0 g
Follow The Directions
01
StepPreheat the oven to 350°F (175°C). Grease and flour three 8-inch round cake pans. Line the bottoms with parchment paper circles. (5 minutes)
02
StepPrepare the pistachio flour: In a food processor, pulse 3 cups of pistachios until finely ground. (3 minutes)
03
StepIn a medium bowl, whisk together the ground pistachios (reserving 1 1/3 cup for later), flour, baking powder, salt, and baking soda. (2 minutes)
04
StepIn a large bowl, cream together the butter and sugar until light and fluffy. (5 minutes)
05
StepGradually beat in the egg whites, one at a time, then stir in the sour cream, vanilla extract, and almond extract. (3 minutes)
06
StepGradually add the dry ingredients to the wet ingredients, alternating with the milk, beginning and ending with the dry ingredients. Mix until just combined. Stir in green food coloring if using. (5 minutes)
07
StepDivide the batter evenly among the prepared cake pans. (2 minutes)
08
StepBake for 22-24 minutes, or until a toothpick inserted into the center comes out clean. (24 minutes)
09
StepLet the cakes cool in the pans for 10 minutes before inverting them onto a wire rack to cool completely. (40 minutes)
10
StepWhile the cakes are cooling, prepare the buttercream: In a large bowl, beat together the cream cheese and butter until smooth. (5 minutes)
11
StepGradually beat in the powdered sugar until smooth and creamy. Stir in the vanilla extract and green food coloring if using. (7 minutes)
12
StepTo assemble the cake, place one cake layer on a serving plate. Spread with 1 cup of buttercream, and sprinkle 1 tablespoon of ground pistachios over top. Repeat with the second layer. Top with the third layer and remaining buttercream. (10 minutes)
13
StepDecorate with the remaining ground pistachios. Chill for at least 30 minutes before serving. (30 minutes)
You need to login to claim your token
🔐 Login to get tokenYOU MAY ALSO LIKE

RECIPE REVIEWS
LEAVE A REVIEW
Please Rate


Vernie Prohaska
Jun 27, 2025The green food coloring is optional but adds a nice touch to the cake.
Alessandra Jacobson
Jun 25, 2025I added a hint of rosewater to the buttercream, which complemented the pistachio beautifully.
Virgil Daniel
Jun 23, 2025This cake was a showstopper at my dinner party. Everyone raved about it!
Narciso Vandervortcorkery
Jun 20, 2025My cake layers domed a bit, but leveling them made for a perfect final product.
Torey Mohr
Jun 19, 2025The recipe was easy to follow, and the cake turned out perfectly moist.
Genoveva Wiza
Jun 19, 2025I made this cake for my mom's birthday, and she said it was the best cake she's ever had!
Dino Nitzsche
Jun 18, 2025Absolutely divine! The pistachio flavor is subtle yet present, and the buttercream is heavenly.
Jakob Kling
Jun 15, 2025Freezing the layers ahead of time was a lifesaver. It made assembling the cake much easier.