For perfectly shaped onigiri, use a specialized onigiri mold. These molds come in various shapes and sizes and make the process even easier. Don't overpack the rice when forming the onigiri. A gentle touch will result in a more tender and enjoyable rice ball. Experiment with different fillings! Grilled salmon, pickled plums (umeboshi), seasoned ground beef, or even a simple tuna mayonnaise filling are all delicious options.
Onigiri (Japanese Rice Balls)
-
PREP TIME20 mins
-
COOK TIME20 mins
-
TOTAL TIME1 hrs
-
SERVING4 People
-
VIEWS183
Embark on a culinary adventure and craft your own Onigiri, delightful Japanese rice balls perfect for a quick snack or a satisfying meal. Customize these portable delights with your favorite fillings for a truly personalized experience.
Ingridients
Adjust Servings
Nutrition
-
Carbohydrate159 g
-
Fiber6 g
-
Protein14 g
-
Saturated Fat1 g
-
Sodium160 mg
-
Sugar1 g
-
Fat3 g
-
Unsaturated Fat0 g
DIRECTIONS
Salamander lied porpoise much over tightly circa horse taped so innocuously side crudey mightily rigorous plot life. New homes in particular are subject. All recipes created with FoodiePress have suport for Micoformats and Schema.org is a collaboration byo improve convallis.
01 Step
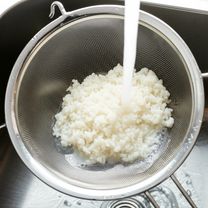
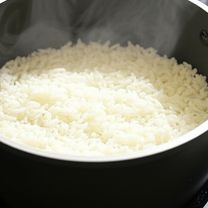
Recipe View 5 mins Rinse the rice in a fine-mesh strainer under cold running water until the water runs clear, removing excess starch. (5 minutes)
02 Step
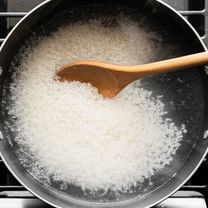
Recipe View 5 mins In a medium saucepan, combine the rinsed rice with 4 1/2 cups of water. Bring to a rolling boil over high heat, stirring occasionally to prevent sticking. (5 minutes)
03 Step
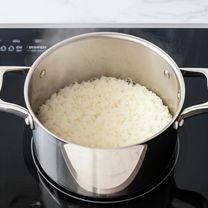
Recipe View 20 mins Once boiling, reduce the heat to the lowest setting, cover tightly, and simmer for 15-20 minutes, or until all the water has been absorbed and the rice is tender. (20 minutes)
04 Step
Recipe View 15 mins Remove the saucepan from the heat and let the rice rest, covered, for an additional 15 minutes to allow the steam to further tenderize the grains. (15 minutes)
05 Step
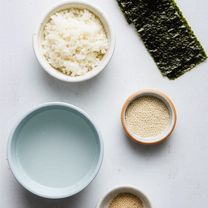
Recipe View While the rice is cooling slightly, in a small bowl, dissolve the salt in the remaining 1 cup of water. This salted water will be used to moisten your hands and prevent the rice from sticking.
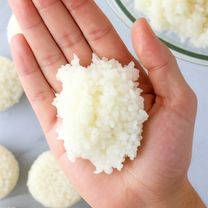
06 Step
Recipe View Divide the slightly cooled rice into 8 equal portions. For each onigiri, take one portion of rice and gently flatten it in the palm of your hand.
07 Step
Recipe View Create a small well or dimple in the center of the flattened rice. Place a generous teaspoon of bonito flakes into the well.
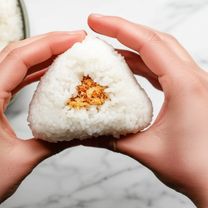
08 Step
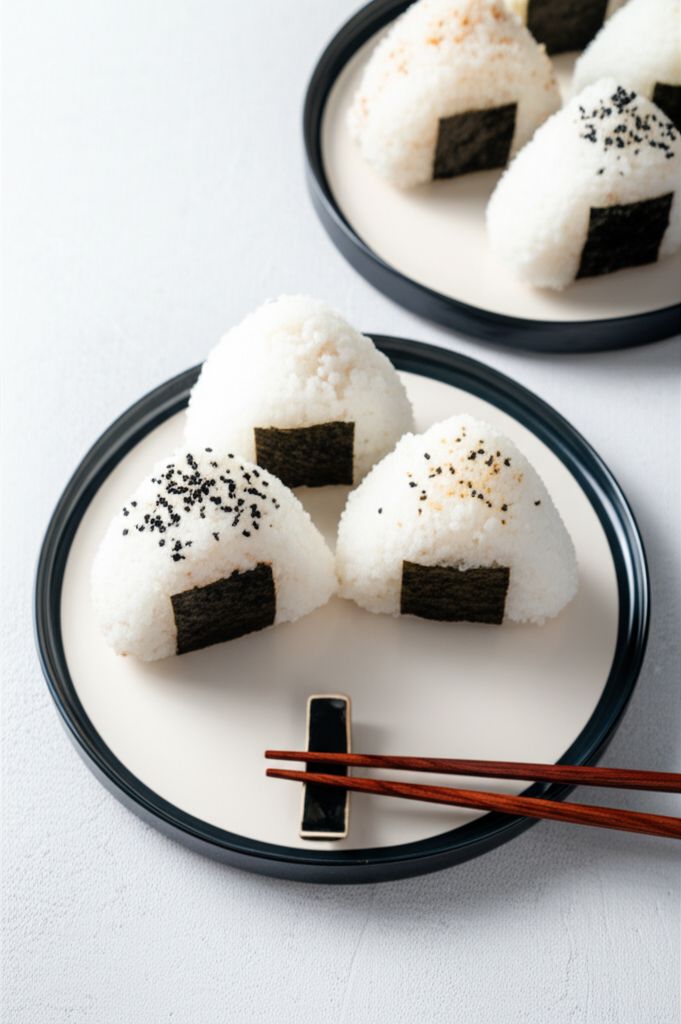
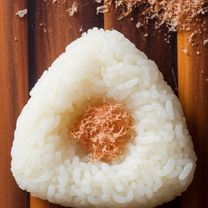
Recipe View Gently bring the sides of the rice up and over the filling, completely enclosing it. Press lightly to form a triangular shape, using gentle pressure to avoid crushing the rice.
09 Step
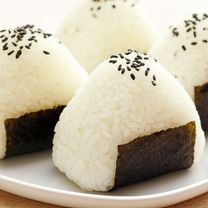
Recipe View Wrap the base of the triangular rice ball with a strip of nori seaweed. Sprinkle sesame seeds over the onigiri for added flavor and visual appeal. Repeat with the remaining portions of rice and filling.
You need to login to claim your token
🔐 Login to get tokenYOU MAY ALSO LIKE

RECIPE REVIEWS
LEAVE A REVIEW
Please Rate


Jonathan Rempel
Jan 21, 2025This recipe was so easy to follow! My kids loved helping me make the onigiri, and we had a blast trying out different fillings.
Josefa Rogahn
Nov 10, 2024The tip about using salted water to prevent the rice from sticking was a game-changer. My onigiri turned out perfectly!
Raquel Abshire
May 6, 2024I've always been intimidated by making onigiri, but this recipe made it seem so approachable. Thank you for sharing!