For a smoother jelly, you can strain the cooked plum mixture through a cheesecloth-lined sieve before ladling it into the jars. Adjust the amount of sugar to taste, depending on the sweetness of your plums. If you don't have canning equipment, you can store the jelly in the refrigerator for up to two weeks.
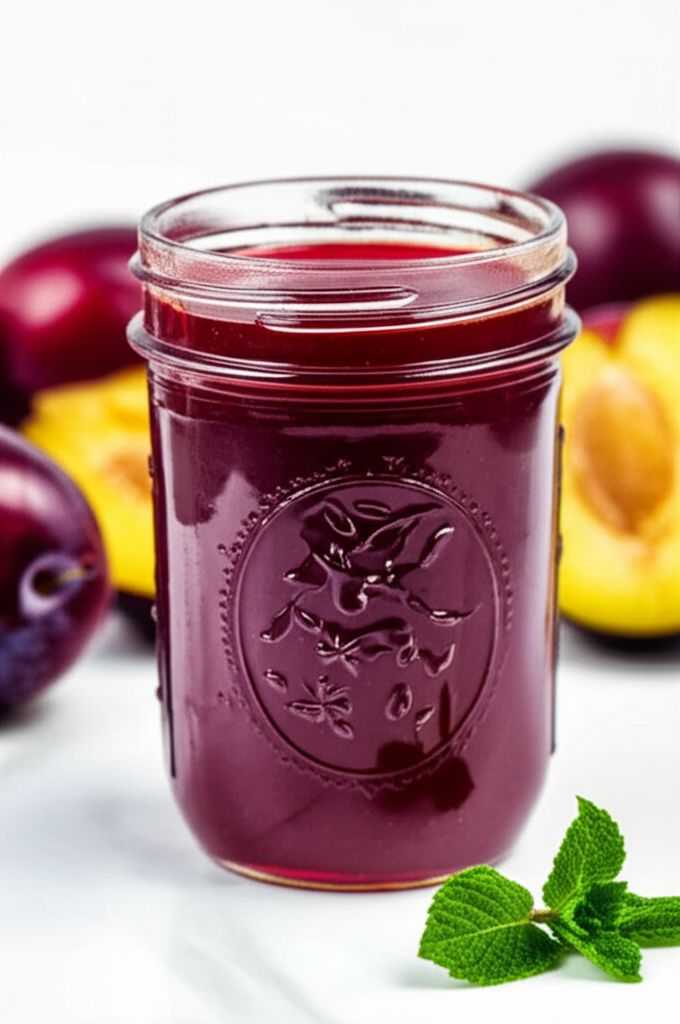
Plum Jelly
-
PREP TIME15 mins
-
COOK TIME45 mins
-
TOTAL TIME1 hrs
-
SERVING5 People
-
VIEWS9
Capture the essence of summer with this vibrant Plum Jelly. Made with fresh, ripe plums, this homemade jelly is a delightful spread for toast, pastries, or a sweet addition to savory dishes. Its rich, fruity flavor and smooth texture make it a pantry staple you'll reach for again and again.
Ingridients
Adjust Servings
Nutrition
-
Carbohydrate186 g
-
Fiber3 g
-
Protein2 g
-
Sodium1 mg
-
Sugar182 g
-
Fat1 g
-
Unsaturated Fat0 g
Follow The Directions
01
StepGather all ingredients. (Prep time: 5 minutes)
02
StepIn a large, heavy-bottomed pot, combine the plums, sugar, and water. (5 minutes)
03
StepBring the mixture to a boil over medium-high heat, stirring constantly until the sugar is completely dissolved. (10 minutes)
04
StepReduce the heat to medium and continue to cook, stirring occasionally to prevent sticking, until the mixture thickens and reaches the desired consistency. This can be tested by placing a small spoonful on a chilled plate; it should set quickly. (30-40 minutes)
05
StepWhile the jelly simmers, prepare your canning jars. Inspect five (½-pint) jars for any chips or cracks, and check rings for rust. Discard any defective jars or rings. Submerge the jars in simmering water to sterilize them until the jelly is ready. Wash new, unused lids and rings in warm, soapy water. (20 minutes)
06
StepOnce the jelly has reached the desired consistency, remove it from the heat and carefully skim off any foam that has formed on the surface. (5 minutes)
07
StepLadle the hot jelly into the hot, sterilized jars, leaving about 1/2 inch of headspace at the top. (10 minutes)
08
StepUse a clean knife or thin spatula to gently run around the inside of each jar to release any trapped air bubbles. (5 minutes)
09
StepWipe the rims of the jars clean with a damp paper towel to remove any jelly residue. (5 minutes)
10
StepCenter the lids on the jars and screw the rings on tightly, but not too forcefully. (5 minutes)
11
StepPlace a rack in the bottom of a large stockpot and fill it halfway with water. Bring the water to a boil. (10 minutes)
12
StepCarefully lower the filled jars into the boiling water using a jar lifter, ensuring they are at least 2 inches apart. Add more boiling water if needed to cover the jars by at least 1 inch. (10 minutes)
13
StepBring the water back to a rolling boil, cover the pot, and process the jars for 15 minutes. (15 minutes)
14
StepTurn off the heat and carefully remove the jars from the stockpot using the jar lifter. Place them on a towel-lined surface, several inches apart, and let them rest undisturbed for 12-24 hours. As the jars cool, you should hear a 'pop' sound as the lids seal. (12-24 hours)
15
StepAfter 12-24 hours, check the seals by pressing down on the center of each lid. If the lid doesn't flex or bounce back, it is properly sealed. Store the sealed jars in a cool, dark place.
You need to login to claim your token
🔐 Login to get tokenYOU MAY ALSO LIKE
RECIPE REVIEWS
LEAVE A REVIEW
Please Rate
LATEST RECIPES
-
 1
1 -
 2
2 -
 3
3 -
 4
4 -
 5
5
Jordan Krajcik
Jun 30, 2025This recipe is so easy to follow! My first time making jelly and it turned out perfect.
Korbin Fadel
Jun 15, 2025I had some trouble getting the jelly to set, but after a little extra cooking time, it thickened up nicely.
Cristina Kuvalis
Jun 15, 2025The jelly has a beautiful color and tastes amazing. I added a pinch of cinnamon for extra warmth.